
Pin on arduino
From the data menu we need to click "Get Data From Text" button and select the text file. Here we will choose "Delimited" and click next, and in the second step, select the comma as delimiter and then finish the wizard. So this process will insert the time and the temperature values into separate columns.
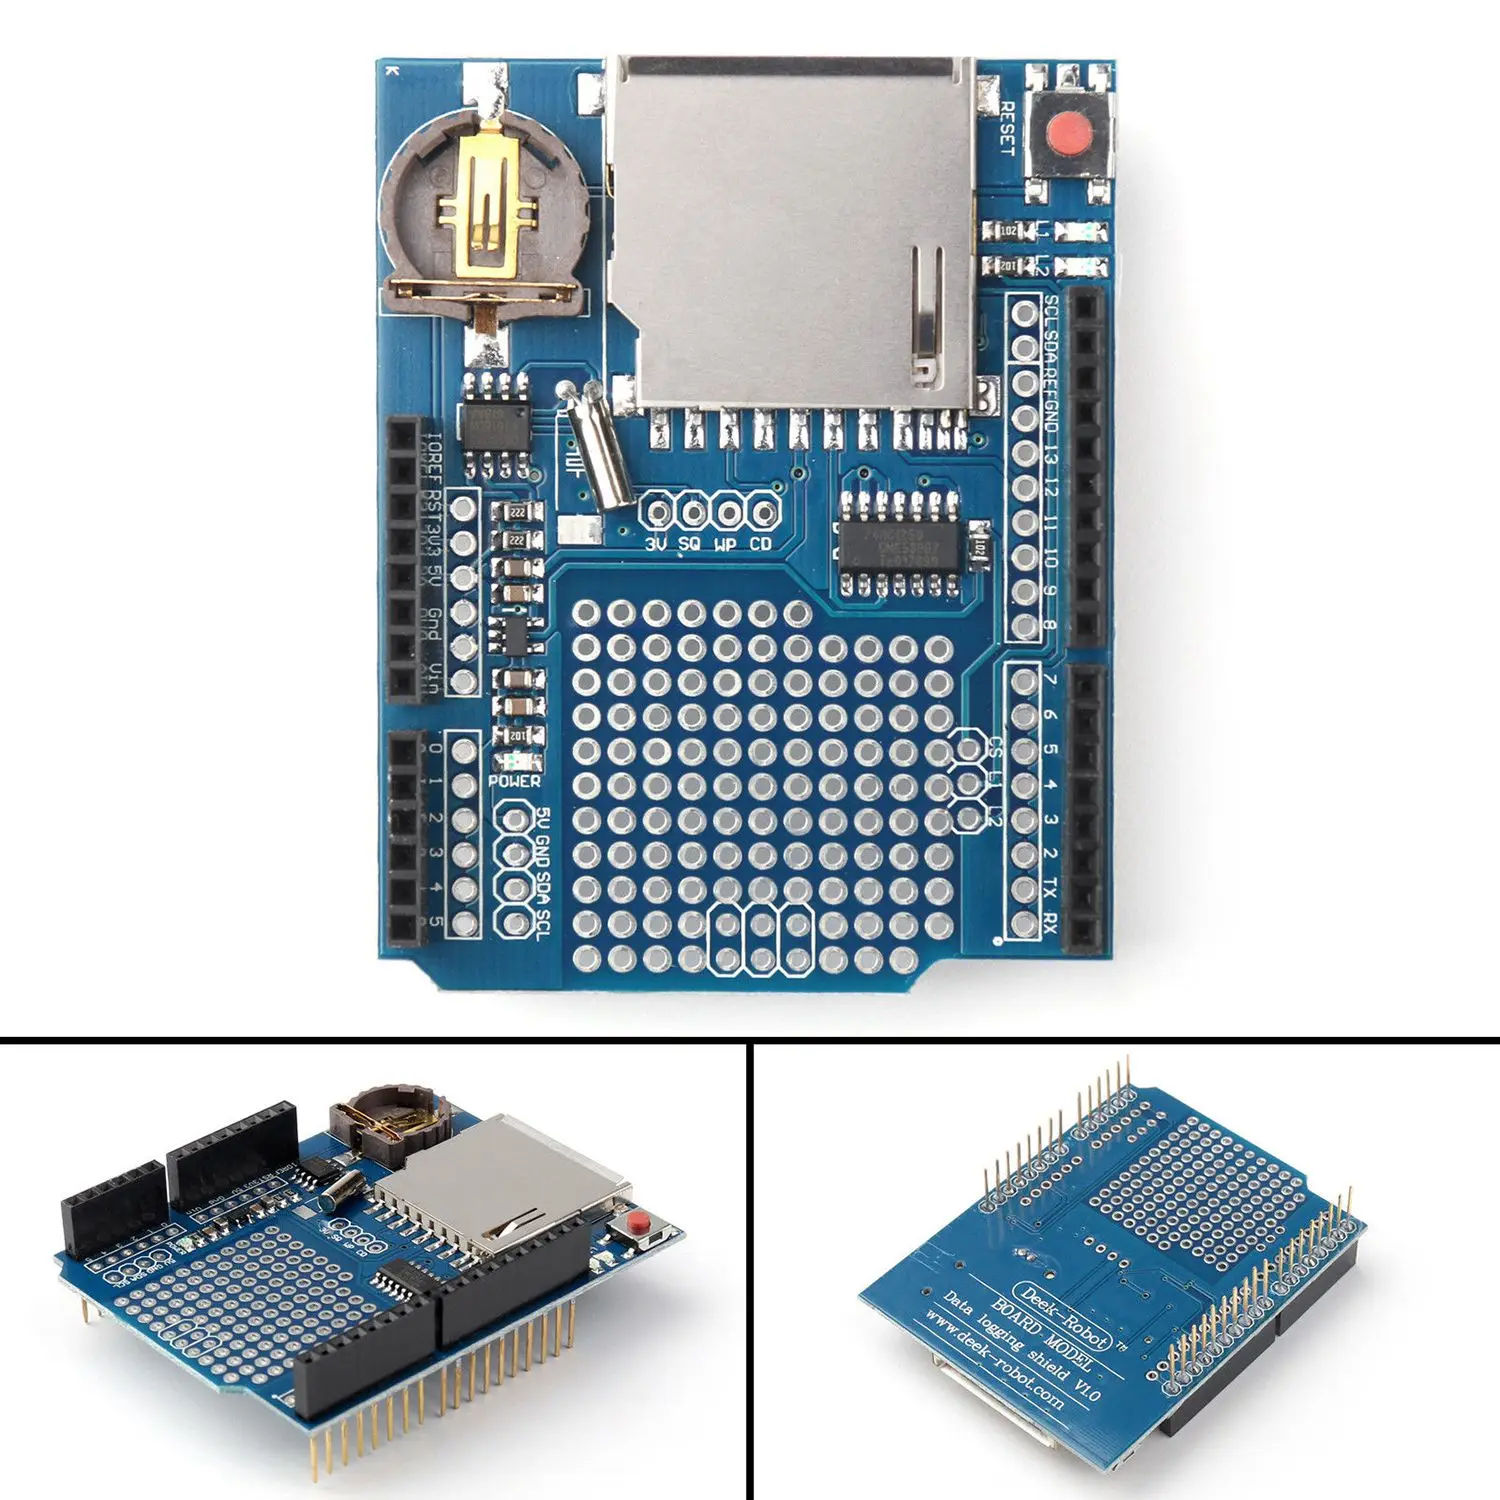
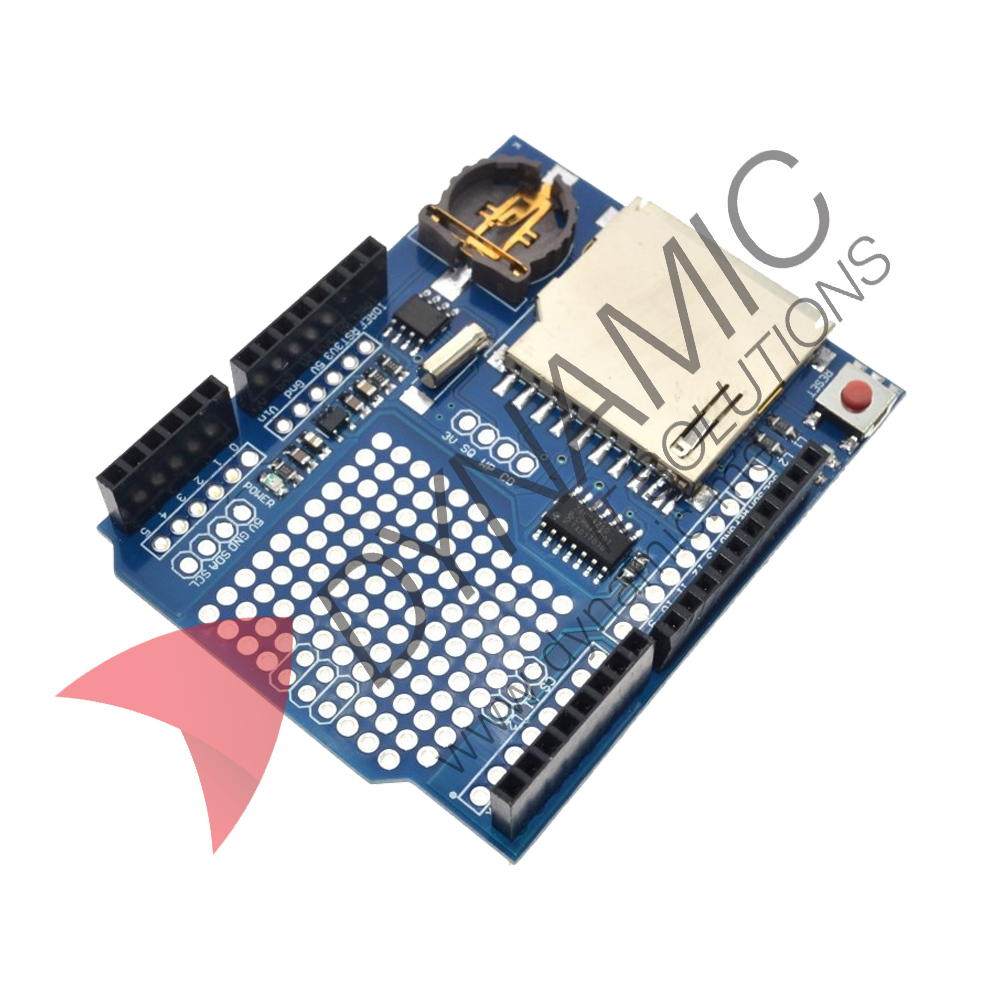
Recorder Data Logger Module Logging Shield XD 204 For Arduino UNO SD
Build Your Own Data Logger. In this 8-part series, we'll go through the practical skills and knowledge base you need to deploy a custom, Arduino-based data logger in the field. Through 6.5 hours of instructional, learn-at-your-own-pace videos, Office Hour events, and resources, we cover everything a beginner to Arduino needs to get started.
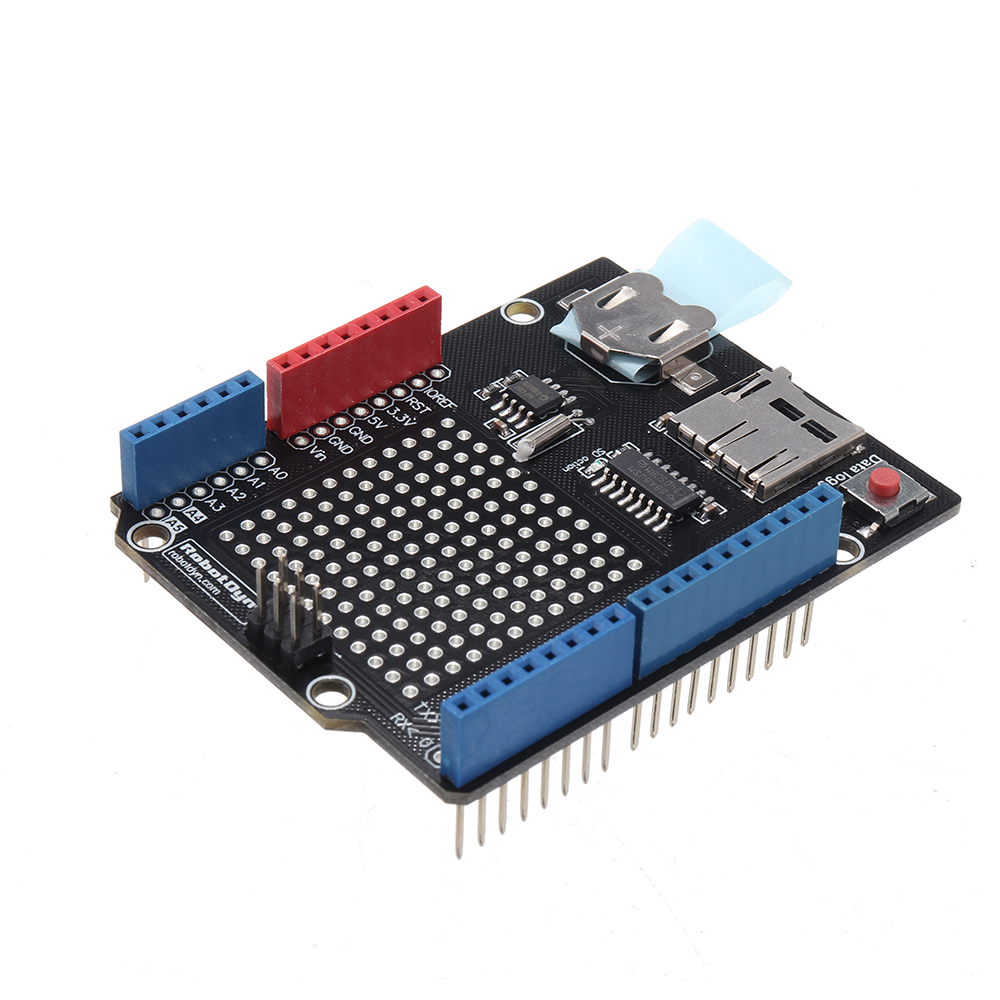
Data Logger DataLog Shield MicroSDcard + DS1307 RTC Module RobotDyn
In the setup (), call SD.begin (), naming pin 4 as the CS pin. This pin varies depending on the make of shield or board. In the loop (), a String is created to hold the information from three analog sensors. The code iterates through the sensors, adding their data to the string. Next, the file on the SD card is opened by calling SD.open ().
Arduino Data Logger Shield buy online at Low Price in India
Download. To design the ALog series of data loggers, we followed the approach taken by the popular Arduino project ( Barragán , 2004; Banzi and Shiloh , 2014) in order to maintain compatibility with open-source standards. We designed the circuitry (hardware) using EAGLE ( Cadsoft and Autodesk , 2019), an electronic schematic and board-layout.

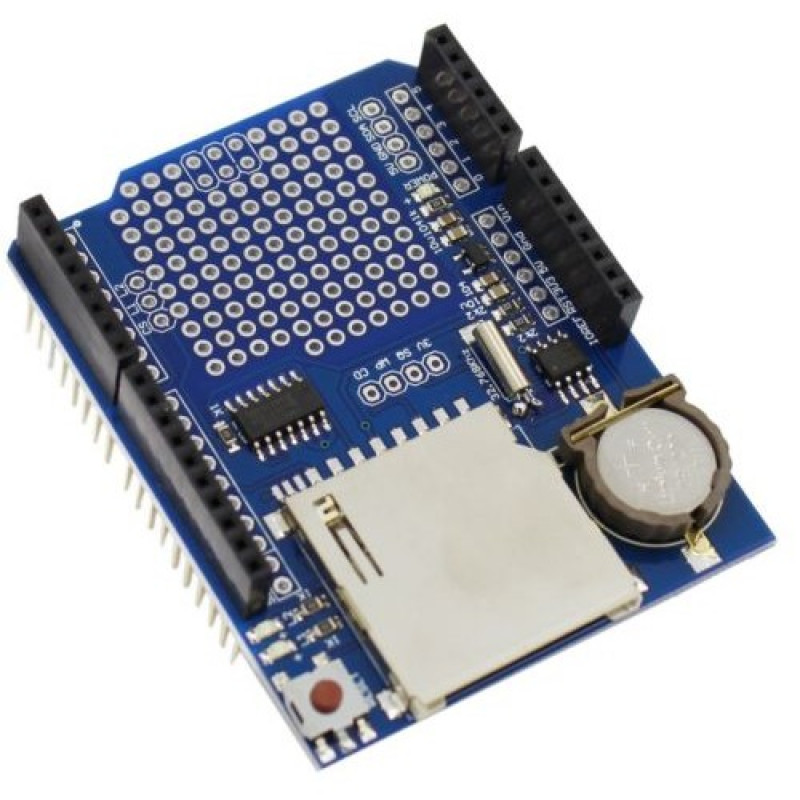
Arduino Data Logger Shield
Step 4: Photosensitive Sensor. For the photosensitive sensor, add a wire from the 5V pin on the Arduino to the same column as the right leg on the part in the breadboard. Change the wire colour to red. Connect the left leg via the pin in the same column to the A0 (A-zero) pin on the Arduino.
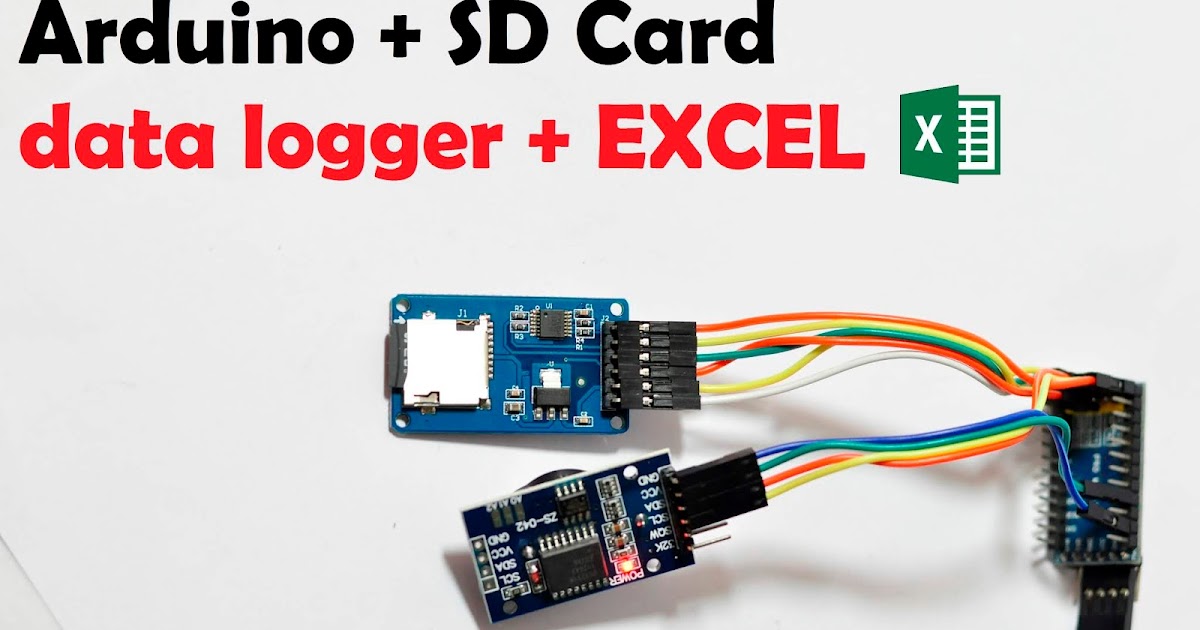
Make it easy! Arduino SD card data logger to Excel
The data is separated by commas, and each reading is in a new line. In this format, you can easily import data to Excel or other data processing software. Wrapping up. This is a great project to learn how to use the SD card module with Arduino to build a data logger. You can apply this concept in pretty much any project you'd like.
Dynamic Arduino Data Logger Shield
Discover unbeatable deals and discounts on the Temu App. Download Now & Save Big! Download the Temu App and start saving more today! Unleash incredible deals and coupons.
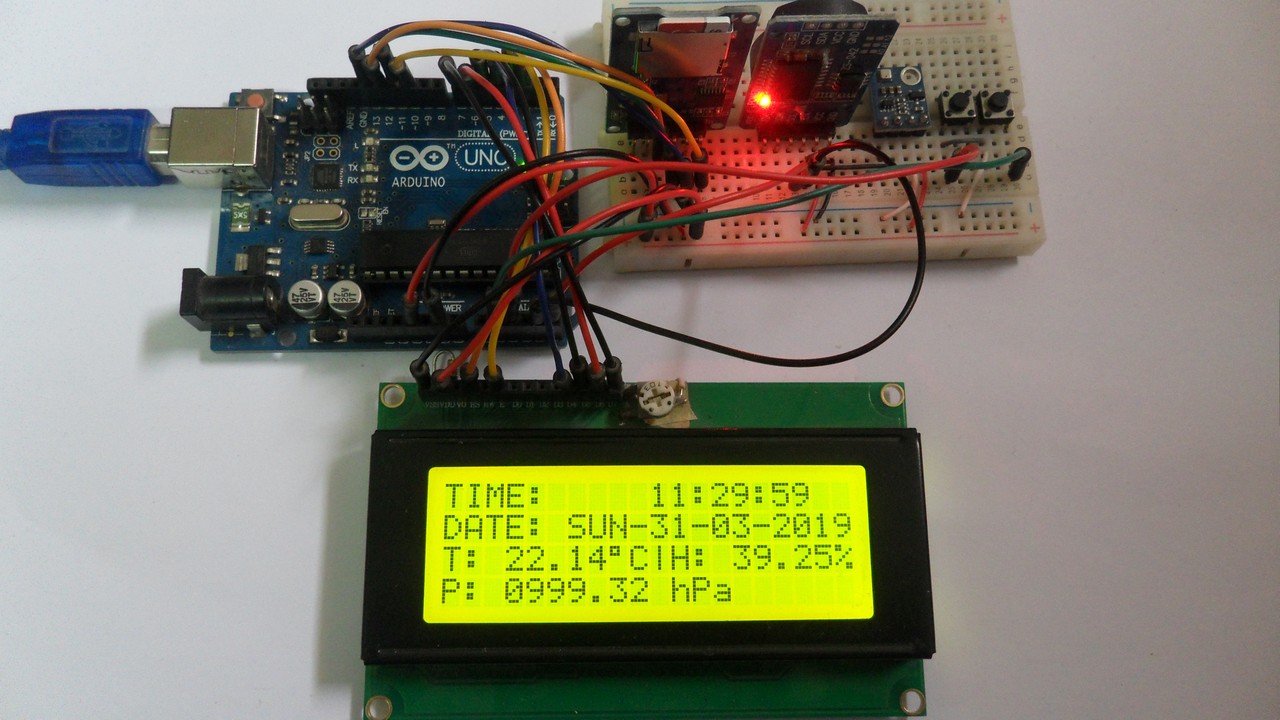
Arduino Weather Data Logger with SD Card Simple Circuit
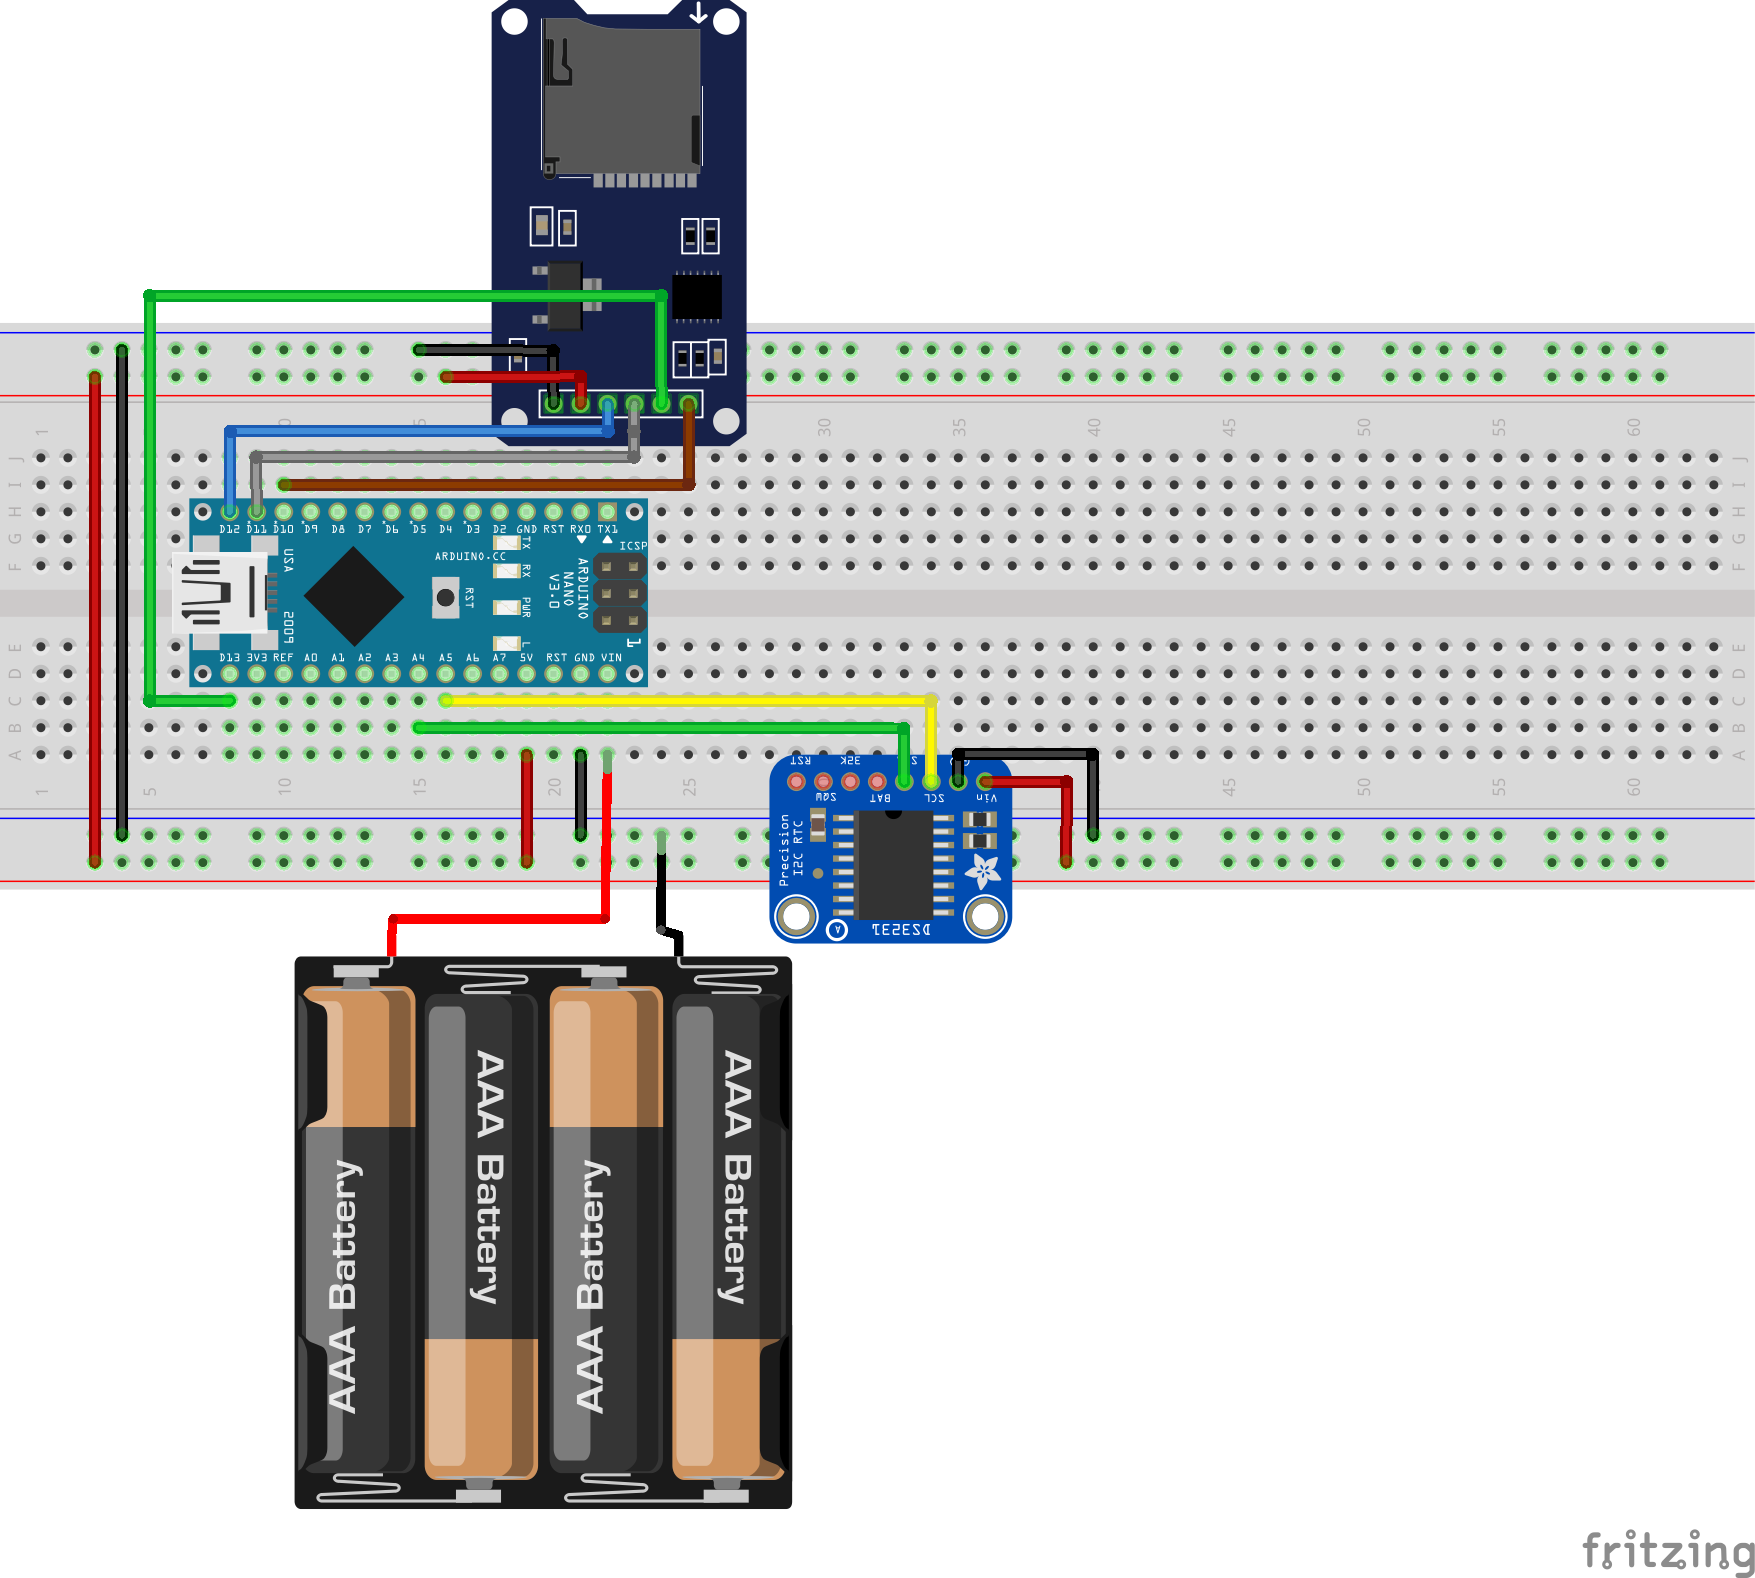
The data logger is made up of the Arduino Nano, the Ds3231 RTC Module, and a micro SD card module. The micro SD card module communicates with the Arduino over SPI as explained in a detailed tutorial here, while the DS3231 module communicates with the Arduino over I2C.A detailed tutorial on the DS3231 module can also be found here.. To simplify the connection further, a pin map of the.
Simple Arduino Data Logger
Image: Jeremy S. Cook. Follow these steps to set up your data logging device. 1. Solder together the data logging shield with the included male headers, using the Arduino Uno as a jig as needed. 2. Solder the DHT11 module's + and - pins to ground and +5V on the prototyping area of the shield. 3. Attach the signal pin to the Arduino digital pin 4.

How to Make an Arduino SD Card Data Logger for Temperature Sensor Data
Step 3: Add Two Sensors. The two sensors we are using are a Photosensitive sensor and Temperature sensor. These sensors evaluate light and temperature. We use Arduino to read the value and display it in the Serial monitor on the Arduino. Search for and add the two sensors. Make sure they are positioned across the columns on the breadboard.
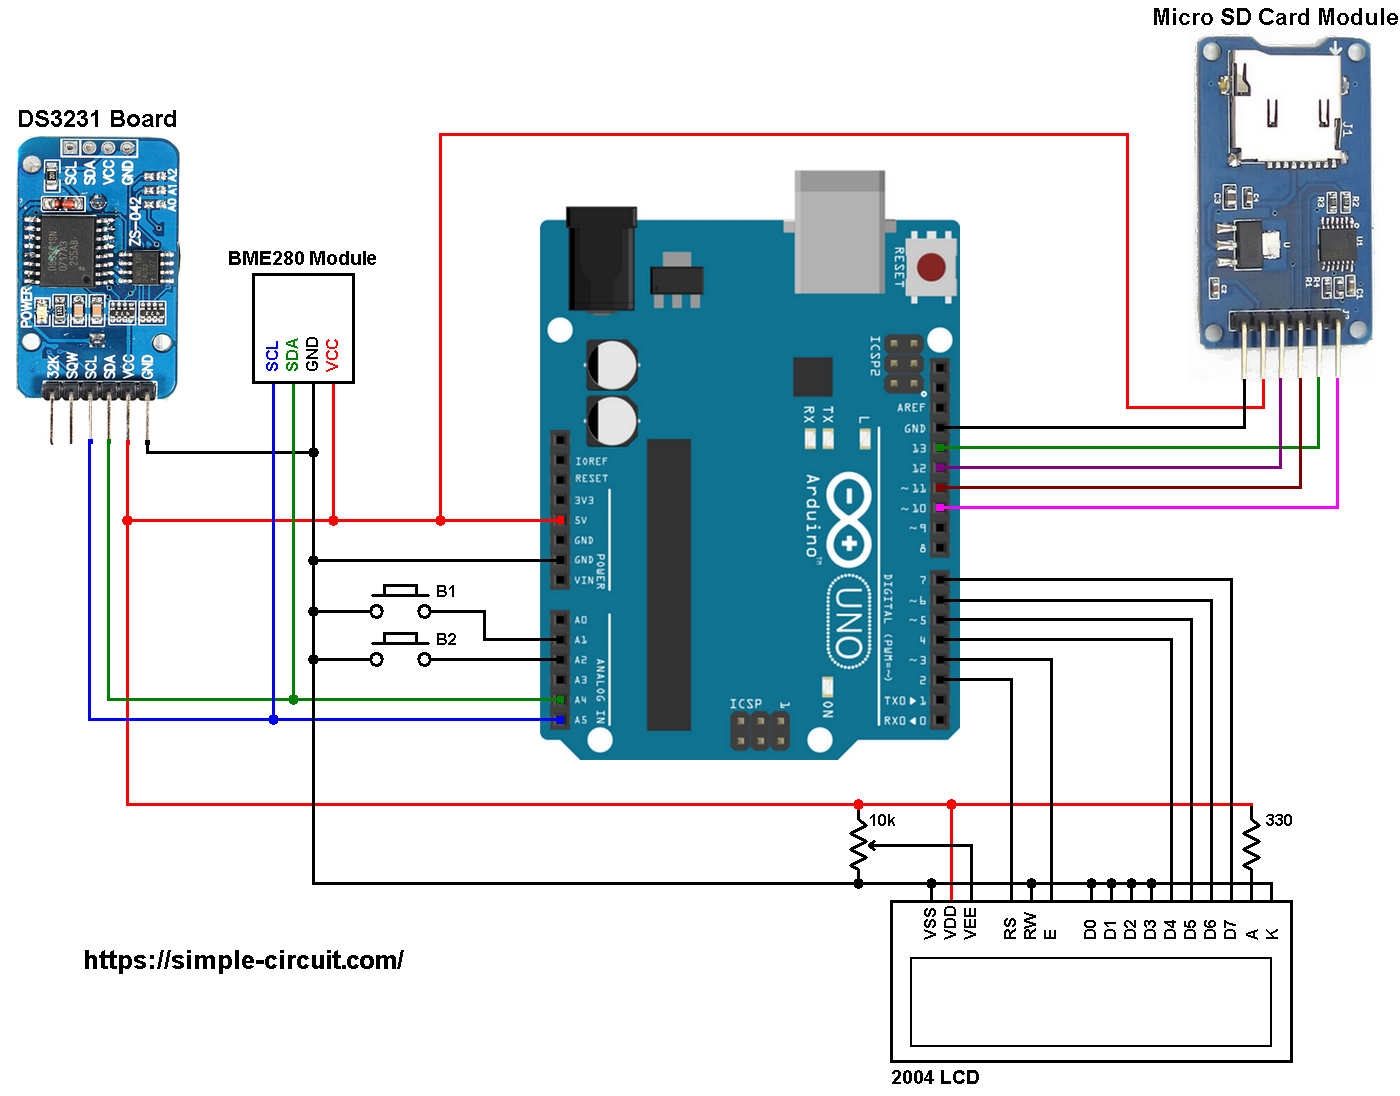
Arduino Weather Data Logger with SD Card Simple Circuit
Copy Code. // A simple data logger for the Arduino analog pins #define LOG_INTERVAL 1000 // mills between entries #define ECHO_TO_SERIAL 1 // echo data to serial port #define WAIT_TO_START 0 // Wait for serial input in setup () // the digital pins that connect to the LEDs #define redLEDpin 3 #define greenLEDpin 4 // The analog pins that connect.
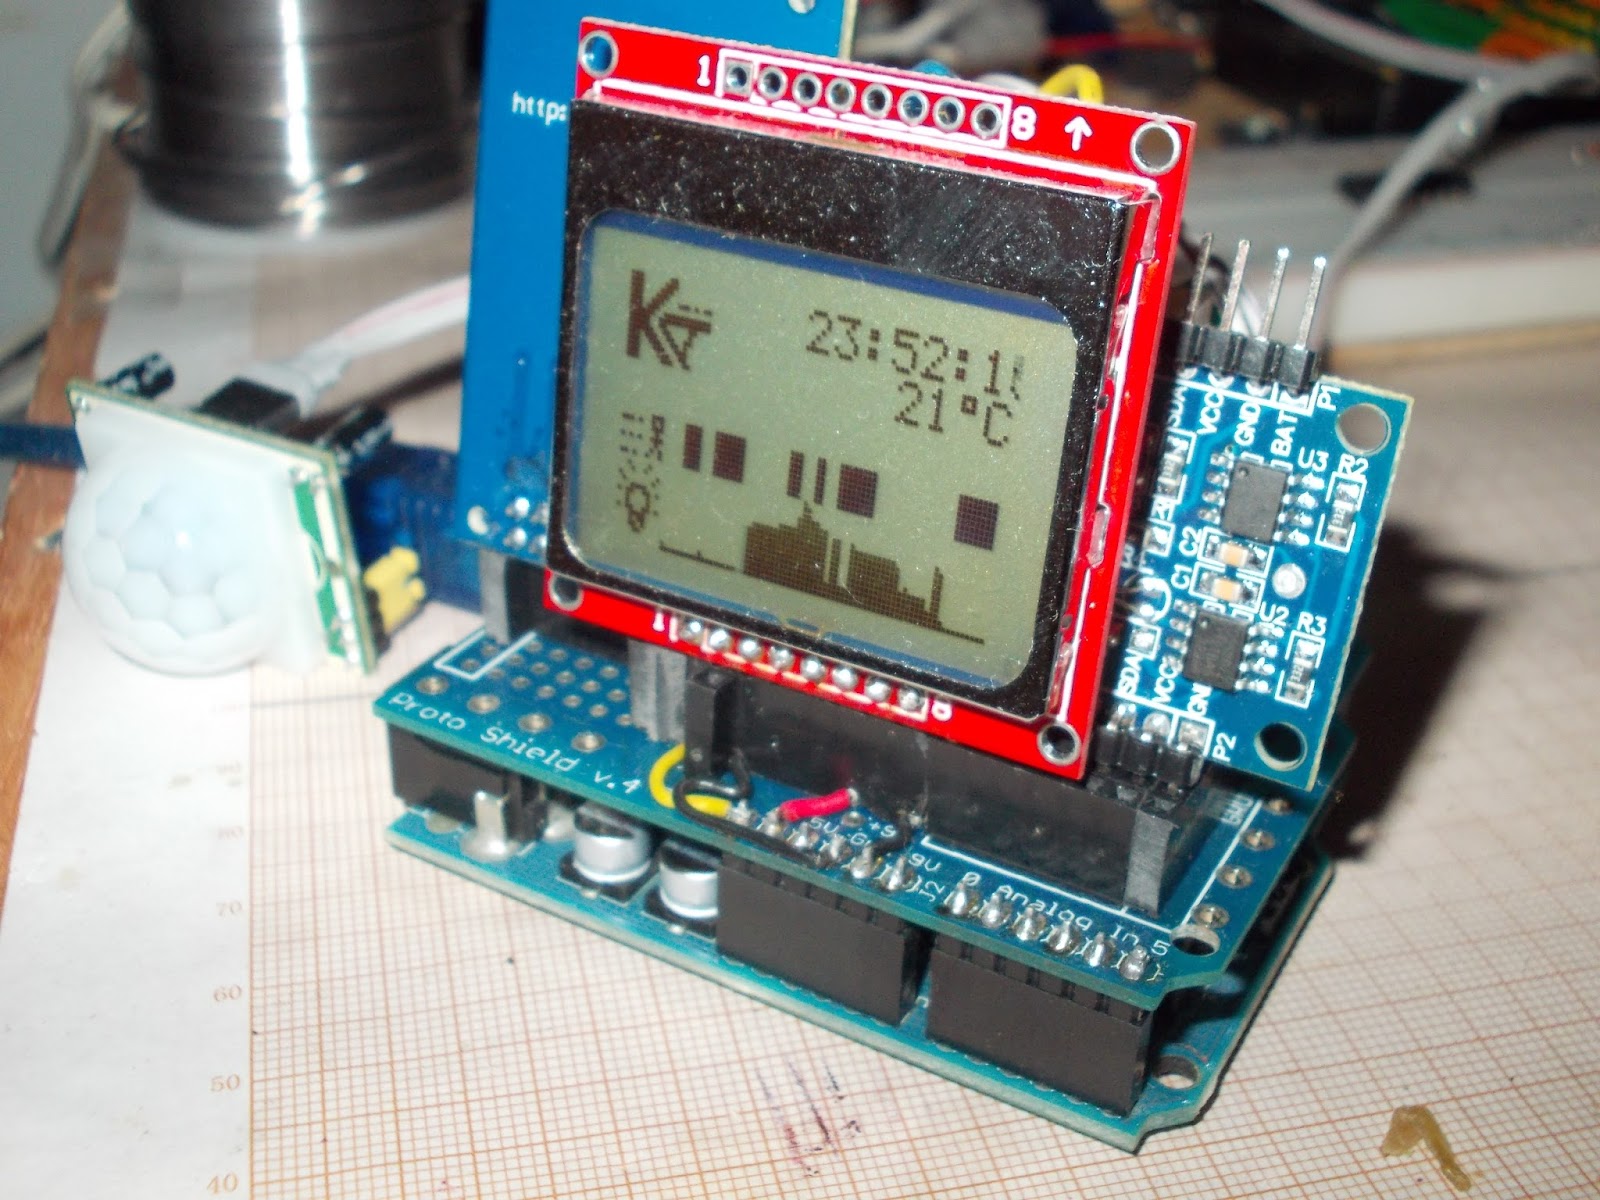
Kostis Lab Arduino data logger
It can use multiple sensors and collect data over time to record events, analyze for trends or help predict events. Using a microcontroller such as an Arduino is an excellent device to do this. In this Instructable, I show how to use an Arduino Uno for data logging complete with a DS1307 real time clock (RTC).

Arduino Temperature Data Logger Random Nerd Tutorials
The included program, SensorTagDLv1.ino, is the complete Arduino 101 program for the data logger. It is liberally commented and what follows is intended as a guide for understanding the program. Some basic knowledge of BLE programming and the linked reference material elsewhere in the article (user guide, GATT table, sensor data sheets) will also aid in understanding the program.
Arduino Data Logger Tutorial How to Log Data from Arduino
Adafruit Assembled Data Logging shield for Arduino. $13.95. Add to Cart. Shield stacking headers for Arduino (R3 Compatible) $1.95. Add to Cart. Adafruit METRO 328 Fully Assembled - Arduino IDE compatible. Out of Stock. Light and temperature data-logger pack. $27.50. Add to Cart.

New Data Logger Module Logging Recorder Shield V1.0 For Arduino UNO SD
The code below is configured for use with an Ethernet shield, which has an onboard SD slot. In the. , naming pin 4 as the CS pin. This pin varies depending on the make of shield or board. , a String is created to hold the information from three analog sensors. The code iterates through the sensors, adding their data to the string.

Arduino Data Logger Shield
As Engineers/Developers we always rely upon the data collected to design or improve a system. Recording data and analyzing them is a common practice in most of the industries, here we are building Arduino Data Logger Project where we will learn how we can log data at a specific interval of time. We will use an Arduino board to read some data (here temperature, humidity, date and time) and save.